REVIEW · GEIRANGER
Geiranger Fjord: Downhill Self-Guided Bike Tour
Book on GetYourGuide →Operated by Excursions.no · Bookable on GetYourGuide
Gravity does the hard work here. You’ll start high above Geiranger, get a quick safety talk, then coast down a jaw-dropping fjord road with Flydalsjuvet scenery calling for stops. It’s an active way to see Geiranger Fjord from above without a hike.
I love that the ride is self-guided in practice: you set your own pace, breathe in the air, and take photos when the view is right in front of you. The small group size (max 8) also keeps the experience feeling controlled and calm instead of chaotic.
One thing to consider: this is mainly the main road, not a protected mountain-bike trail. If the weather is rough or traffic is heavy, you’ll need real bike confidence and patience.
In This Review
- Key things you’ll notice
- Downhill Geiranger: Why This Ride Feels Special
- Where You Meet and How You Get Ready in Geiranger
- The Djupvatnet Lake Start: What 1,030 M Changes
- Flydalsjuvet Viewpoint: The Photo Stop That Makes Sense
- How the Road and Traffic Affect Your Ride
- What the 3-Hour Timing Really Means
- Pacing, Photos, and the Skill You Actually Need
- Rain, Road Closures, and the Eagle Bend Backup
- Price and Value: Is $156 Worth It?
- Who Should Book This Downhill Bike Tour (and Who Should Skip)
- Should You Ride Geiranger Fjord Downhill?
- FAQ
- How long is the Geiranger Fjord downhill bike tour?
- Where do I meet for the tour in Geiranger?
- Is the tour guided while you ride?
- What’s included in the price?
- What should I bring with me?
- What’s the minimum age requirement?
- Are there any health conditions that make this tour unsuitable?
- What happens if the road to Djupvatnet Lake is closed?
- How many people are in the group?
Key things you’ll notice
- Djupvatnet Lake start: kicked off from about 1,030 meters above sea level
- Flydalsjuvet viewpoint: the classic photo moment built into the ride
- Main-road biking: you share the road with buses and camper vans
- Small group of 8: less waiting, smoother coordination, safer feeling
- Self-guided but not alone: you get kitted out and briefed, then ride independently
- Rain-proof depends on you: downhill in bad weather means careful braking and control
Downhill Geiranger: Why This Ride Feels Special
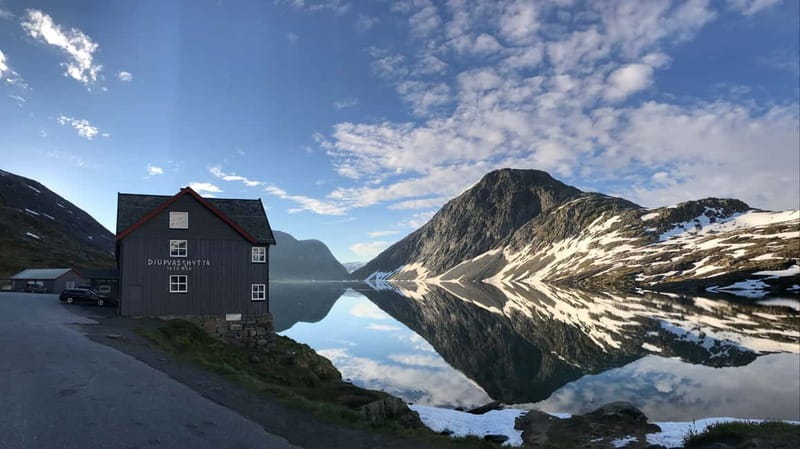
There are plenty of ways to see Geiranger Fjord. This one is different because you combine two things that normally don’t meet: dramatic elevation and real motion. You’re driven up, then you spend the best part of the trip coasting downhill while the fjord unfolds in front of you.
What makes it work is the altitude jump. Starting from around Djupvatnet Lake at roughly 1,030 meters above sea level means you get a fjord view that feels wide and immediate, not just something you glimpse from the roadside. Then, as you drop, the road keeps revealing new angles—water, cliffs, and that signature Norway “how is this real?” feeling.
And because it’s on a road you can ride, you get to spend your effort on enjoying the scenery rather than climbing for hours. You’ll still do real bike work—mainly steering and braking—but it’s the kind of activity that stays fun even if you’re not training for a cycling event.
You can also read our reviews of more tours and experiences in Geiranger.
Where You Meet and How You Get Ready in Geiranger
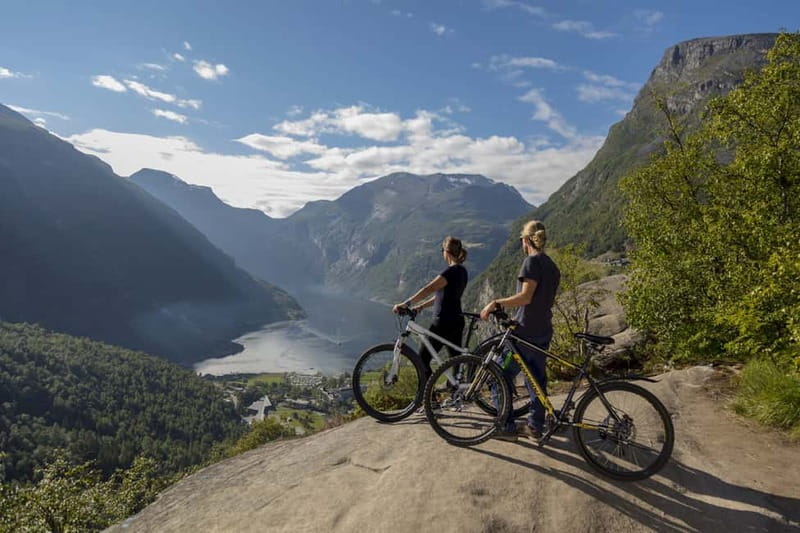
You’ll meet at the local supplier’s office at Geirangervegen 10, right before Cafe Ole. That matters because you’re starting in a real travel hub, not a remote bus stop. Once you check in, you’ll have a short safety talk in English and get kitted before the drive uphill.
You’ll be provided with:
- a bike
- a helmet
- bicycle gloves
- a visibility vest
That’s a big value point. Norway weather can change fast, and gloves and a helmet make a difference when you’re dealing with wind, rain, or quick stops. The visibility vest also isn’t just for show. When you’re mixing with other vehicles on an active road, being easy to see is smart.
Then comes the practical part: you’re driven up to your starting point. That transfer saves you from the hardest climb—and it also means the ride starts when everyone is ready for the descent.
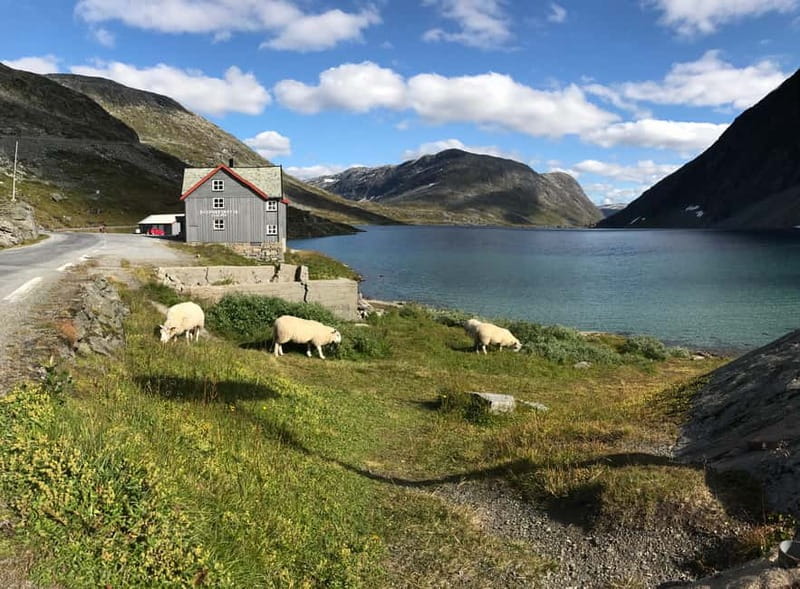
The Djupvatnet Lake Start: What 1,030 M Changes
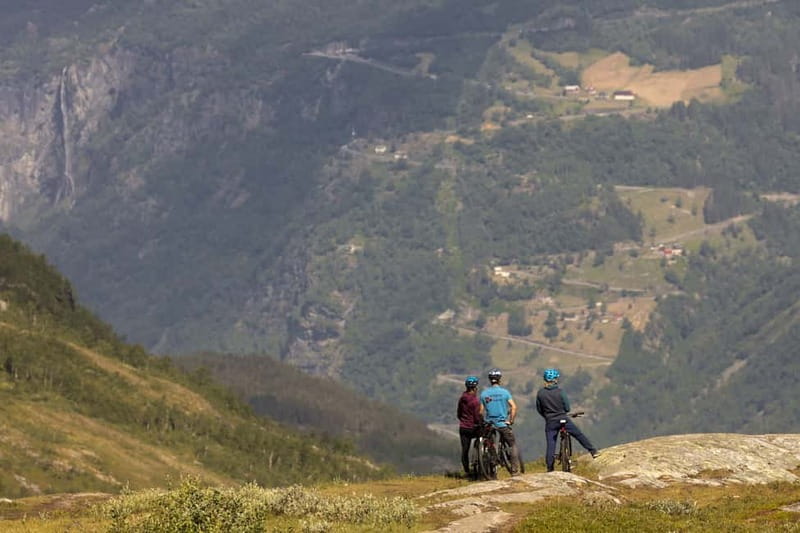
The tour begins at the Djupvatnet Lake area. You’ll be taken up by vehicle to about 1,030 meters above sea level, and that height shapes the whole experience.
First, you’re starting with perspective. From up high, the fjord isn’t just scenic—it’s structured. You can actually read the shoreline and the way the water curves through the valley. That helps the later stops feel more meaningful because you recognize where you are as you descend.
Second, you’ll feel the temperature shift. Even in comfortable weather, higher elevation can mean cooler wind. Bring warm clothing and a windbreaker. You don’t want your first ten minutes to be a cold, shaky warm-up.
Third, the downhill feels more dramatic than you might expect. Reviews and experience both point to the same truth: this is exhilarating, but it’s not casual biking. You’ll want to be ready to steer smoothly and brake confidently from early on, not after you’re already rolling fast.
Flydalsjuvet Viewpoint: The Photo Stop That Makes Sense
Flydalsjuvet is the name to remember. This ride is designed so you can get to the famous viewpoint during the downhill flow, not after a long detour.
You’ll want to stop there, even if you usually hate “photo stops.” The view is the payoff for starting high. The viewpoint shows the fjord’s character in a way that’s hard to replicate from street level. Water, cliffs, and depth stack together, and it’s the kind of sight that makes you forget you paid for anything.
Also, the ride gives you space to pause. One of the most repeated bits of practical feedback is that you can go at your own pace and still make it safely. That means you’re not sprinting to satisfy a schedule. You can slow down, line up a shot, then continue when you’re ready.
Tip from how this ride plays out: bring snacks and water so you’re not doing stressful “hurry up” decisions on a stop. A quick munch at the right moment keeps you steady.
How the Road and Traffic Affect Your Ride
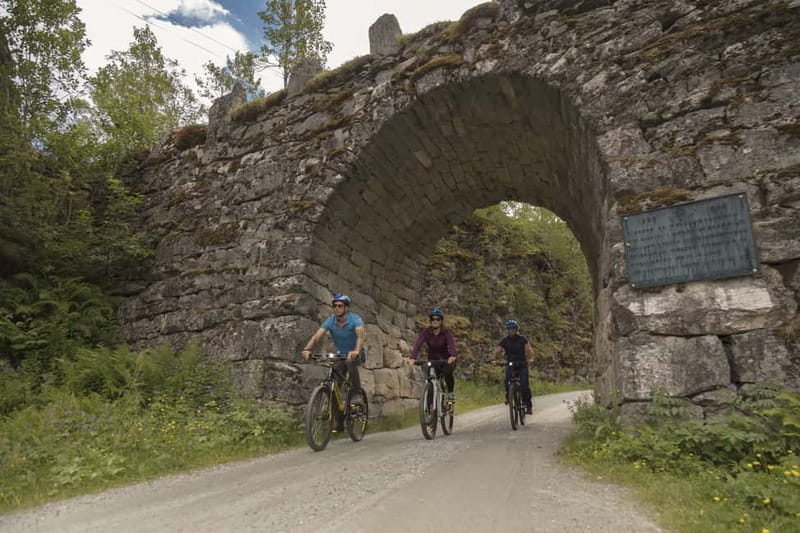
Here’s the reality check that keeps this tour honest: you’re biking down a section of road used by other vehicles. There is no dedicated mountain-bike trail according to what people experience on this route. Instead, it’s mostly main-road riding, with tour buses and camping vans around—especially during peak times.
This is where that small group and the pre-ride safety talk matter. Even without a guide riding beside you, the setup helps you understand what to do in traffic: where to be cautious, how to ride with awareness, and how to control speed.
In practical terms, you should expect:
- frequent slowdowns or brief stops when cars and buses pass
- more attention to your mirrors and braking than you might plan for
- the need to ride “defensive,” not just fast
If you’re planning this on a busy day, go in with patience. This isn’t a quiet mountain descent with empty roads. It’s a spectacular corridor you share with real travel traffic. The upside is you get the fjord views right next to the road rather than after walking to them.
What the 3-Hour Timing Really Means
The total duration is about 3 hours, but the actual riding time is closer to 2.5 hours. That extra half hour is doing real work: meeting, safety briefing, fitting you with gear, and the drive up to Djupvatnet Lake.
So your day doesn’t feel like “start to finish full gas cycling.” It’s a compact outing. That’s great if you’re already traveling around Geiranger and don’t want to lose most of the day to one activity.
One more reason the timing is good: you’re not stuck riding tired. You start high, ride downhill while attention is highest, then you’re done. That’s a nice energy match for most people, even if you’re not a cyclist.
Pacing, Photos, and the Skill You Actually Need
You don’t need to be a mountain-bike racer. You do need bike control, smooth steering, and good braking habits. People who enjoy this ride tend to like that it lets them keep a comfortable rhythm. If you want to stop for photos, you can. If you want to coast steadily and just enjoy the air, you can do that too.
The big skill requirement is simple: you must be able to ride a bike. Nothing fancy is mentioned, but balance and confidence matter. And in rain or heavy mist, confidence becomes even more important.
One practical note from how weather affects descents: if it’s wet, tires can feel less grippy and braking requires more care. This is not the moment to experiment with new technique. If you’re a confident rider in everyday conditions, you’ll be fine. If you only ride on flat ground, you may find this challenging.
What to bring helps here. Pack:
- sportswear
- warm layers
- a windbreaker
- snacks and water
Also, do yourself a favor and ride with spare focus. You’re managing speed, turns, and traffic awareness in one go.
Rain, Road Closures, and the Eagle Bend Backup
This tour is dependent on good weather conditions. If conditions aren’t right, you won’t get the exact route as planned.
If the road to Djupvatnet Lake is closed, you’ll be offered an alternative starting point from the Eagle Bend viewpoint. That’s a key contingency detail, because it means the operator is thinking about continuity: you still get a downhill experience even if the main access is unavailable.
What you should take from this: keep an open mind about what you see during the ride. You’re signing up for Geiranger Fjord views from above and along the descent, but the precise starting point may shift based on access. That’s normal in Norway, and it’s one reason flexibility helps.
Price and Value: Is $156 Worth It?
$156 per person for about a 3-hour outing sounds straightforward, but the value comes from what’s included and what you’re avoiding.
You’re paying for:
- transportation up to the starting area (so you don’t climb)
- the bike itself
- helmet, gloves, and a visibility vest
Those inclusions matter because they remove hassle. You don’t have to rent a bike separately, and you don’t have to show up with the right safety gear. It also makes the experience easier for travelers who want something active but not complicated.
You’re also paying for a high-drama route: one of the most spectacular roads in the world, with Flydalsjuvet and a view down toward the fjord that’s hard to beat. The cost can feel high if you compare it to a casual scenic drive. But compare it to the experience you get—altitude start, real descent, photo stops, and vehicle support—and it starts to look like a reasonable way to “buy time” for the views.
My rule: if you’re comfortable biking and you want a hands-on way to see Geiranger’s fjord scale, this price feels fair.
Who Should Book This Downhill Bike Tour (and Who Should Skip)
This is best for riders who want scenery plus motion, without a long uphill slog. It suits people who:
- can ride a bike confidently
- like photo stops and self-paced sightseeing
- understand they’ll share the road with traffic
It’s a good fit for most active travelers who already explore on foot. You’re doing something different, but not so technical that you need specialized training.
On the other hand, it may not be for you if:
- you have back problems or heart problems (the activity isn’t considered suitable)
- you don’t meet the age requirement (you must be at least 12, accompanied by an adult)
- you’re not comfortable riding in possible rain or reduced visibility
Also, it’s not designed for unaccompanied minors. If you’re bringing kids, plan for adult presence throughout the experience.
Should You Ride Geiranger Fjord Downhill?
If you want a scenic Geiranger experience with movement, I’d book it. This ride gives you fjord views from above, a built-in visit to Flydalsjuvet, and a downhill that’s thrilling without being a multi-day cycling ordeal.
I’d especially recommend it if you:
- like compact activities that fit into a busy travel schedule
- enjoy photo pauses instead of sprinting through stops
- feel comfortable riding a bike on roads with other vehicles
Skip it if you’re anxious about rain, braking, or mixed traffic. The “no dedicated trail” reality means you must ride with care, not bravado.
FAQ
How long is the Geiranger Fjord downhill bike tour?
The experience is about 3 hours total. The cycling time is approximately 2.5 hours.
Where do I meet for the tour in Geiranger?
Meet at the local supplier’s office at Geirangervegen 10, directly before the coffee shop Cafe Ole.
Is the tour guided while you ride?
No. You get a safety talk and gear setup, but there is no guide accompanying you during the ride.
What’s included in the price?
The price includes transportation to the starting point, the bike, a helmet, bicycle gloves, and a visibility vest.
What should I bring with me?
Bring warm clothing, a windbreaker, snacks, water, and sportswear.
What’s the minimum age requirement?
You must be at least 12 years old, and you must be accompanied by an adult.
Are there any health conditions that make this tour unsuitable?
Yes. It is not suitable for people with back problems or heart problems.
What happens if the road to Djupvatnet Lake is closed?
An alternative starting point from the Eagle Bend viewpoint is offered.
How many people are in the group?
It’s a small group, limited to a maximum of 8 participants.