REVIEW · ANDALSNES
Geiranger: Sky to Fjord Downhill Biking Adventure
Book on Viator →Operated by Excursions.no · Bookable on Viator
One road, sixteen kilometers, huge fjord payoff. I love how this downhill setup gives you big-view photo stops like Flydalsjuvet and Kvandals waterfall, while still delivering that rush of riding down Norway’s famous mountain road. I also like that the essentials are handled for you with a bike plus helmet, gloves, and a visibility vest. One thing to consider: it’s unguided, so you need to be comfortable taking responsibility for your pace, stops, and bike fit.
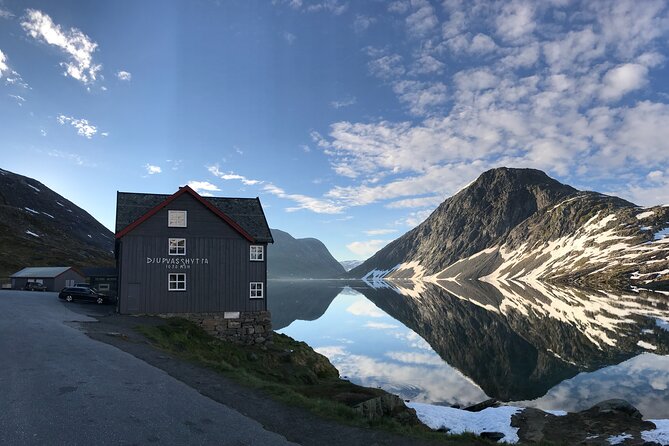
You’ll start in Geiranger and get transported up to Djupvatn Lake, at 1,030 meters above sea level, in an air-conditioned vehicle. The group stays small (up to 6), which usually makes for a smoother start and easier bike handoff. If you’re thinking about skipping a section or asking questions, know the staff attitude seems to vary by operator and moment, and drivers can differ in how much they help beyond getting you set up (one driver named Marcell was described as gracious when someone chose not to ride).
In This Review
- Key Things That Make This Ride Worth It
- From Geiranger to Djupvatn Lake: Why the Start Matters
- The 16 km Descent: What the Ride Feels Like
- Stop-by-Stop: Flydalsjuvet and the Viewpoints You Actually Remember
- Flydalsjuvet (Stop 1)
- Viewpoint at the foot of Blåfjell mountain
- Kvandalls waterfall
- Opplenskedalen Valley
- Knuten
- How to use the stops without losing momentum
- Unguided Means You Set the Pace (and Handle the Details)
- Bike, Helmet, Gloves, Vest: Included Gear, Real-World Fit Checks
- Do a fast bike fit check before you commit
- Tires and brakes are your safety layer
- Wear the gear you’re given
- Traffic on the Road: When You Might Want to Ride Slower or Walk
- Price and Value: Is $160.09 Worth 2.5 Hours?
- Who This Fits Best (and Who Might Skip Part of It)
- Weather, Light, and the Day You Get
- Should You Book This Downhill Bike Adventure?
- FAQ
- How long is the Geiranger Sky to Fjord downhill biking adventure?
- What’s the downhill distance?
- Do I ride with a guide?
- What gear is included?
- Where do I meet for the tour?
- What fitness level do I need?
- What happens if weather is bad?
Key Things That Make This Ride Worth It
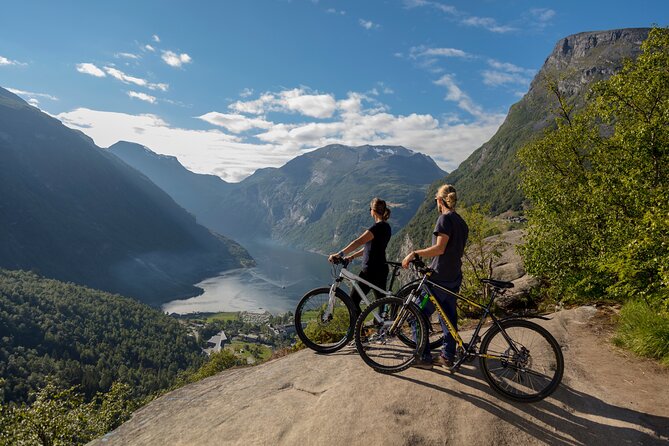
- Djupvatn Lake start (1,030 m): you’re not just “starting at the top,” you’re starting at altitude for a faster, more dramatic descent.
- 16 km downhill with viewpoint stops: you can pause for photos at major spots instead of racing the road.
- Basic safety gear included: helmet, gloves, and a high-visibility vest mean you’re not showing up empty-handed.
- Unguided ride means control is yours: you ride at your own pace, which is great for photos, but you must stay sharp.
- Traffic and road shoulder vary by section: some parts can feel tight if larger vehicles are nearby.
- Bike condition and sizing can be a deciding factor: most people feel the equipment is good, but it’s smart to do a quick fit check before committing.
From Geiranger to Djupvatn Lake: Why the Start Matters
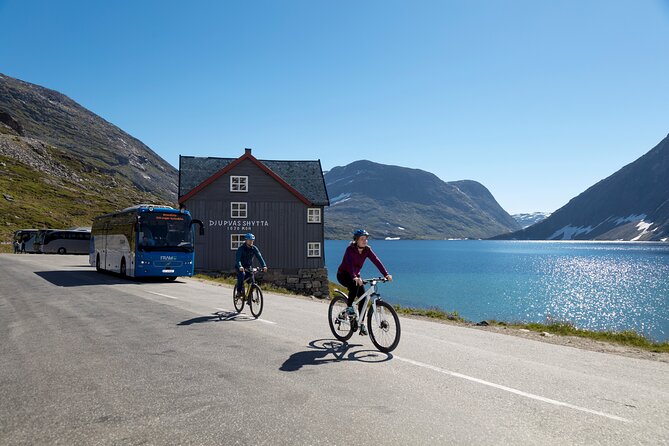
This isn’t a “walk to a bike rack and go” kind of activity. The real setup is the climb first. You get lifted from Geiranger to Djupvatn Lake, 1,030 meters up, by air-conditioned vehicle. That matters because gravity is the secret ingredient here. The higher you start, the less you have to think about pedaling and the more you can focus on steering, braking, and enjoying the views.
The ride timing also helps your day planning. The whole experience runs about 2 hours 30 minutes, and it ends back at the same meeting point in Geiranger (Geirangervegen 10). That makes it a good fit on a day when you want one standout activity without committing your entire afternoon.
Small group size (maximum 6 people) is another practical plus. In a crowded setting, it’s harder to get quick help adjusting a seat or making sure your helmet strap fits right. Here, you’re less likely to feel like you’re part of a moving assembly line.
You can also read our reviews of more tours and experiences in Andalsnes.
The 16 km Descent: What the Ride Feels Like
Once you drop in, you’re covering 16 km downhill, with chances to stop at viewpoints along the way. In plain terms: you’ll spend your time controlling speed and enjoying the scenery, not wrestling the bike uphill.
Most of the route is coast-down style riding. Still, be mentally ready for at least a brief “you might need to pedal” moment. One rider described a short section that required light pedaling uphill, and another noted they chose to walk part of the road rather than push through. That’s not a dealbreaker. It’s just a reminder that “downhill” can still include small interruptions where you regain your momentum.
Because you’re riding an open road (not a car-free bike path), the way you handle speed matters. If you’re the type who likes to stop often for photos, keep extra distance between yourself and any vehicles behind you. And if you’re not sure about the bike fit, check it before you roll far. An uncomfortable seat or hard-to-control brakes can turn a dream ride into work fast.
Stop-by-Stop: Flydalsjuvet and the Viewpoints You Actually Remember
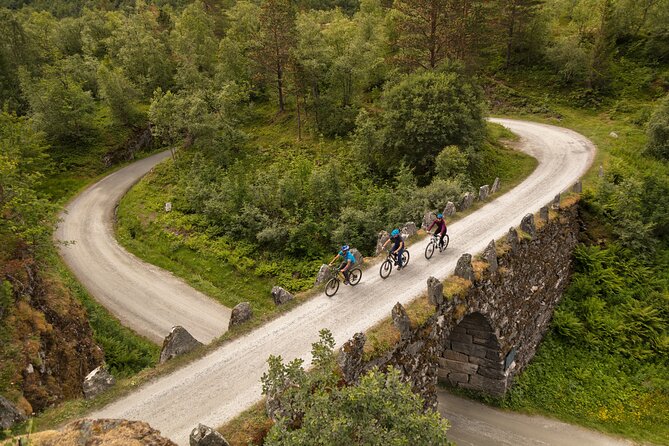
The ride includes multiple scenic pull-offs where you can pause, take pictures, and take in the fjord-and-mountain drama. Stop 1 is Flydalsjuvet, which is often the one people remember long after the bike is packed away.
Here’s what to expect from each named stop, and why it’s worth using your “slow down” moments:
Flydalsjuvet (Stop 1)
This is the most famous stop listed, and it’s your first big photo break. It’s a strong start because you get a quick reward right away, before your focus narrows into steering and speed control. If the weather is clear, this is where you’ll want to spend a little longer, not just snap-and-go.
Viewpoint at the foot of Blåfjell mountain
This stop gives you a different angle from the higher ridges. At the foot of Blåfjell, you tend to feel closer to the scale of the terrain around the road. It’s a good moment to slow down, check your braking habits, and reset your timing.
Kvandalls waterfall
Waterfalls in Norway can be dramatic even when the air is cool and gray. This stop is included specifically for a reason: it’s a natural visual “reset” during the descent. Take a moment here even if you’re tempted to keep rolling. Your brain will thank you later when you look at your photos and notice you didn’t just blur everything.
Opplenskedalen Valley
A valley stop is where you can see how the road threads through the terrain. Instead of only focusing on what’s right next to you, you get a wider sense of the fjord area and how the mountains frame the views.
Knuten
Knuten is another listed viewpoint stop. In practical terms, this is one of those places where you’ll want to step off the bike, turn your body slightly, and watch the sightlines change as you move position. With downhill rides, the view can shift quickly as you go.
How to use the stops without losing momentum
Because the ride is unguided, you control your stop length. I’d plan to spend extra time at Stop 1 (Flydalsjuvet) and then keep later stops shorter unless the weather is perfect. If it’s windy or wet, prioritize safety and don’t linger right where vehicles might be nearby.
Unguided Means You Set the Pace (and Handle the Details)
A big feature here is that the downhill ride takes place without the presence of a guide. That’s a double-edged sword.
On the good side, you’re free to stop for photos as often as you want. You can ride at your own pace, and you’re not tied to a group-waiting rhythm. People who want flexibility usually love that.
On the caution side, you’re also the one who must make the ride work. That includes:
- Riding at a speed where you can stop safely when you need to
- Staying aware of traffic around the road
- Watching for the next planned viewpoint area so you don’t miss a stop
One person found their initial instructions minimal once they were dropped at the top, just being told to ride downhill. If that’s your situation, you’ll want to do two things right away:
- Confirm which direction to ride and where the first stop is meant to be.
- Ask about what to do if something goes wrong (like a flat tire), before you leave the meeting area and before you lose cell signal.
Also remember: it’s described as suitable for people with moderate physical fitness. Unguided doesn’t mean “no effort,” it means you manage your own riding and small uphill moments if they show up.
Bike, Helmet, Gloves, Vest: Included Gear, Real-World Fit Checks
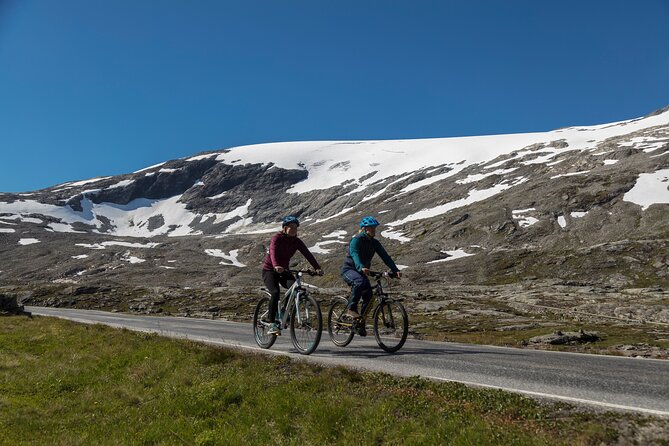
The included equipment list is straightforward: bike, helmet, bicycle gloves, and a visibility vest. You’re also provided safety instructions and lots of tips from the team before you start.
Still, the most important part is the fit. One rider had a great experience with excellent, easy-to-manage bikes. Another rider had a very different outcome: poor sizing, tires that lacked tread, sticky brakes, and helmet straps that were hard to adjust. That range matters, because with downhill biking, your ability to steer and brake confidently is the whole game.
Here’s how I’d keep this practical and low-stress:
Do a fast bike fit check before you commit
Even if staff are helpful, don’t assume the bike will automatically match your body. Before you ride:
- Make sure the seat height feels right (you should reach the pedals without locking your knees awkwardly).
- Check that the helmet straps adjust easily and sit securely.
- Test braking feel while you’re still in a safe, low-speed area.
Tires and brakes are your safety layer
If anything feels off about tire grip or braking responsiveness, speak up immediately at the top. One negative experience specifically called out sticky brakes and tires with no tread. You don’t want to discover those issues once you’re already moving fast downhill.
Wear the gear you’re given
Gloves and the visibility vest may feel like “belt and suspenders,” but they matter. Gloves help with control. The vest helps you be seen, especially on a road shared with larger vehicles.
Traffic on the Road: When You Might Want to Ride Slower or Walk
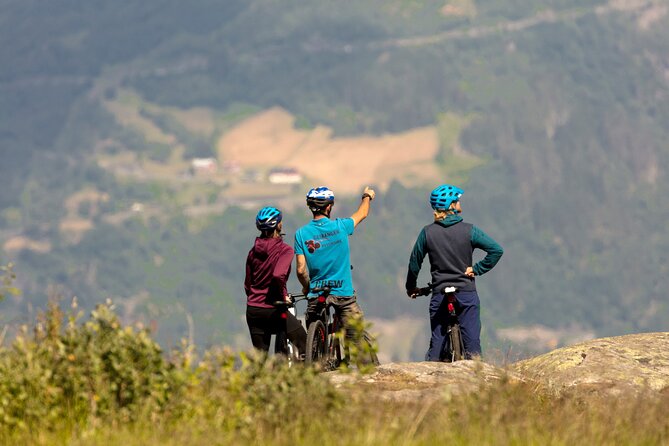
This is a scenic downhill, not a protected cycling lane. One concern raised was that parts of the descent can feel close to larger buses, with little to no shoulder for riders. Another rider countered that the traffic was accommodating and the ride felt manageable.
So what should you assume? You should assume the road can be busy during the day, and that conditions can change quickly. If you’re a cautious rider, plan to:
- Keep extra braking distance
- Let larger vehicles pass as needed
- Avoid stopping suddenly right in the active travel lane area
And if you hit a section that feels uncomfortable, it’s totally valid to dismount and walk that part. In fact, one rider specifically walked a small uphill section and then continued once the road allowed easier riding. That mindset turns the ride from stressful into doable.
Price and Value: Is $160.09 Worth 2.5 Hours?
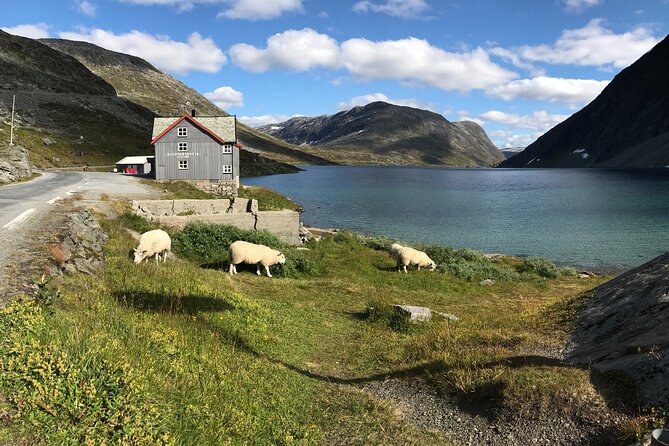
At $160.09 per person for about 2 hours 30 minutes, you’re paying for three things at once:
- A mountain lift up to Djupvatn Lake in an air-conditioned vehicle
- Bike and basic protective gear included
- Multiple pre-planned scenic stops where you can pause and enjoy the views
That can be strong value if:
- You want an adrenaline hit without having to bring your own gear
- You like downhill riding and are comfortable handling an unguided experience
- You care about the exact photo stops listed (rather than improvising pull-offs)
But it’s not automatic value if:
- You expect a fully guided ride with ongoing coaching
- You don’t want to take responsibility for navigation and pacing
- You’re picky about bike condition and fit (and you don’t have the patience to troubleshoot if something feels wrong)
The best way to protect your money is simple: treat the top-of-the-line safety and fit check as non-negotiable. Ask questions right away, confirm how stops are handled, and make sure the bike feels safe before you start.
Who This Fits Best (and Who Might Skip Part of It)
This downhill biking adventure is best for people who want controlled adrenaline and scenic rewards. It’s also described as requiring moderate physical fitness, which makes sense because the bike ride is mostly downhill but can include a short uphill interruption.
I’d especially recommend it if:
- You’re comfortable riding on roads shared with vehicles
- You enjoy stopping for photos and want flexibility
- You want a “one afternoon highlight” from Geiranger without a full-day commitment
- You travel with a small group and like the feeling of fewer people to manage
I’d think twice (or plan a walk option) if:
- You dislike close traffic environments
- You rely on a guide for confidence-building
- You’re concerned about bike setup and want extensive on-the-fly adjustments
The small group helps. The unguided format helps. But your comfort with road conditions is what will decide whether this feels like Norway’s greatest fun day or a nervous chore.
Weather, Light, and the Day You Get
The activity requires good weather. If conditions aren’t right, you’ll be offered a different date or a full refund. That’s important here because downhill biking is safer and more enjoyable on dry roads with good visibility.
Also, since you’re at higher elevation near Djupvatn Lake, you may feel changes in temperature and wind compared with Geiranger village. Bring that mindset to your clothes. If it’s cool at the top, it can be chilly on the descent too, especially if you’re moving fast and stopping to take photos.
If you’re booking as a shore excursion, keep your schedule buffer in mind. Bad weather can shift plans. But at least you have an off-ramp: reschedule or refund, depending on the situation.
Should You Book This Downhill Bike Adventure?
Book it if you want a short, high-impact activity in Geiranger where the views are built into the ride: the fjord-and-mountain panorama, waterfall stop, and Flydalsjuvet photo moment are the reason to do it. The included bike and protective gear can make it a practical splurge, and the small group size keeps things calm.
Skip it or choose it with caution if you strongly prefer guided rides, if you’re anxious about traffic, or if your bike comfort is non-negotiable. Since it’s unguided, your safety depends on doing a quick fit check and riding with extra awareness.
If you’re on the fence, my honest “decision shortcut” is this: if you’d enjoy downhill riding even if you had to handle speed and stops yourself, you’ll likely have a great day. If you want someone coaching you step by step, look for a guided option instead.
FAQ
How long is the Geiranger Sky to Fjord downhill biking adventure?
It lasts about 2 hours 30 minutes.
What’s the downhill distance?
You’ll cover about 16 km downhill.
Do I ride with a guide?
No. The downhill ride takes place without the presence of a guide.
What gear is included?
The bike, helmet, bicycle gloves, and a visibility vest are included. You’ll also be transported in an air-conditioned vehicle.
Where do I meet for the tour?
The meeting point is Geirangervegen 10, 6216 Geiranger, Norway. The activity ends back at the meeting point.
What fitness level do I need?
The activity is for people with a moderate physical fitness level.
What happens if weather is bad?
The experience requires good weather. If it’s canceled due to poor weather, you’ll be offered a different date or a full refund.